In this activity we will work towards creating a simple rainbow in Processing.
In this part we will complete a Critical Thinking Sheet. In other words, we will critically think through different parts of the challenge, make sketches of our ideas, and consider the key components, and the algorithmic steps. In this way we can create a quick plan, that will help us better implement the code. In part 2 we will code the same scene.
Overview
Don’t rush into coding. Instead think critically about your problem before you start. Make a quick sketch of your idea. It will give you direction, help you throw out bad ideas and keep good ones, and help you know when you have completed the task.
Jonathan C. Roberts
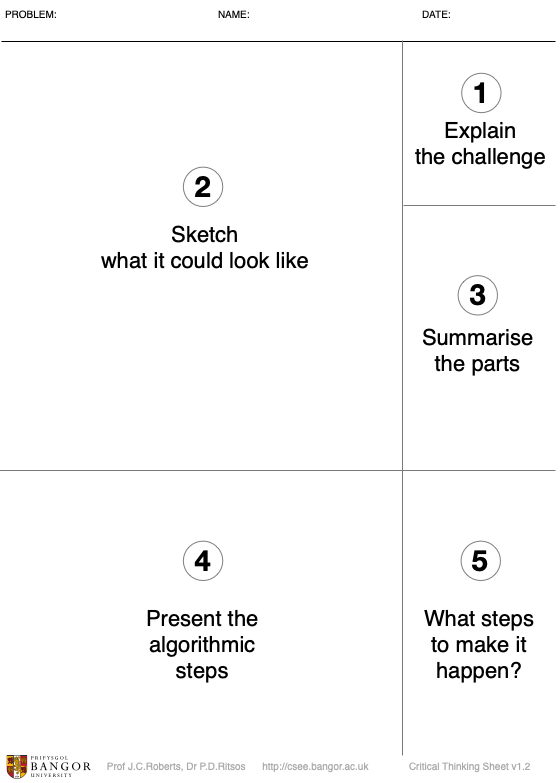
The critical thinking sheet defines a set of five stages, that are located across five areas in single page. The sheet is designed as a guide to help you quickly and critically consider different parts of a program.
Our goal is to create a rainbow scene, with grass and a simple looking tree. We will be using a set of circles to create the rainbow; by creating the rainbow in this way, we will be able to think through several very important principles in computer graphics: (i) sketching a visual goal, (ii) thinking through the main parts, and (iii) considering the algorithmic steps, especially the order of how the colours are drawn on the computer.
Resources
For this activity you will need the following resources.
- One sheet of plain paper
- A black fine tip pen, or an HB pencil
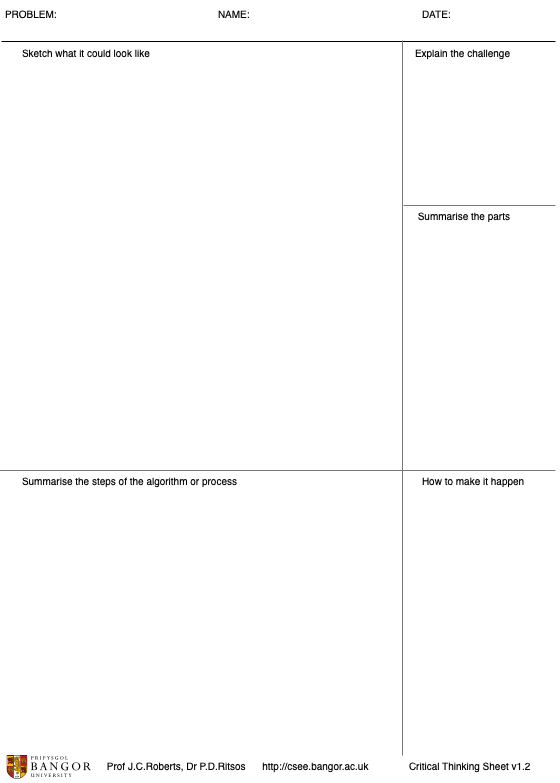
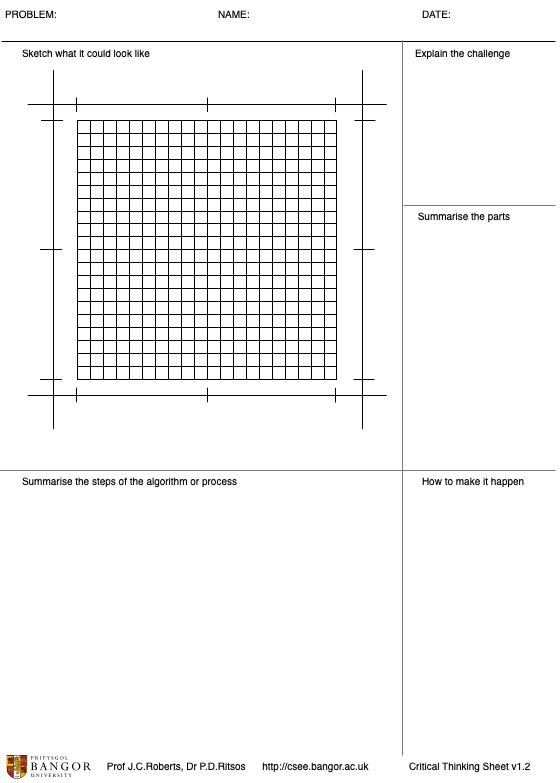
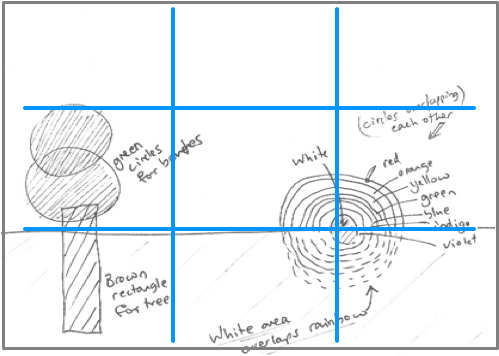
Printer paper will be fine. In fact, if you have a printer available to use, then print out one of our pre-prepared Critical Thinking Sheets. There are two versions, one without a grid, and another with a grid on the sketch part. For this activity we will use the one without a grid.
Step 1. Prepare the sheet, and name the scene
“Whatever you are doing: make a plan. Especially, before you code make a quick sketch, to show what the final result could look like.”
Jonathan C. Roberts
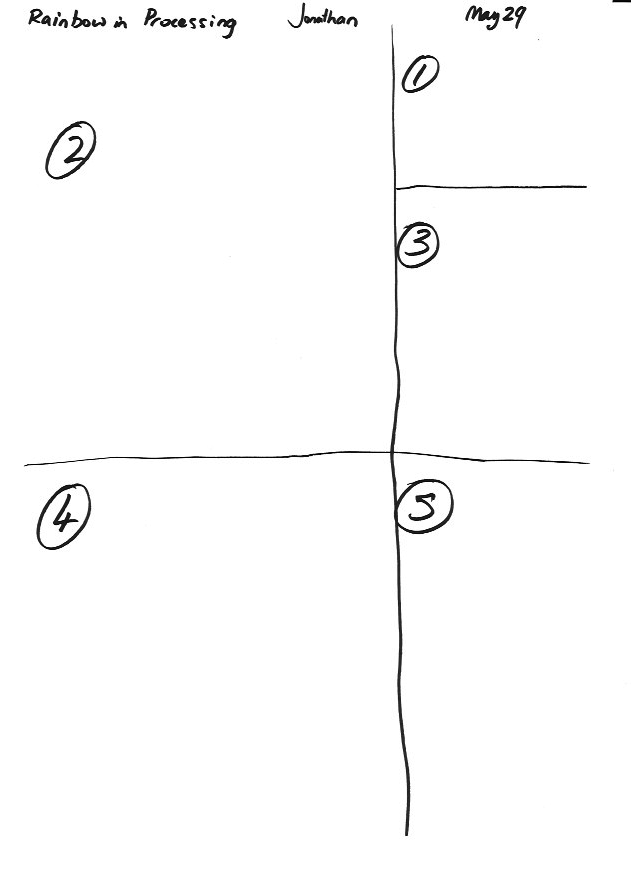
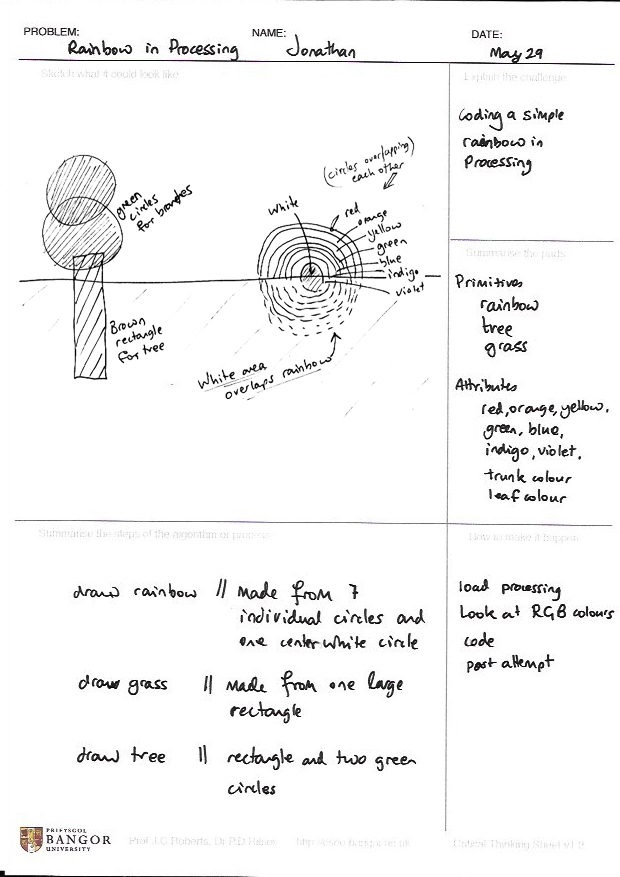
Start with the blank sheet of paper and draw one line vertically and a two horizontal lines, as shown. This divides the page into five panels. Alternatively get your printout which is already drawn in this way. In my sketch, I’ve labelled these panels ① to ⑤ so we can refer to them, but you don’t need to number them! These numbers also follow the Steps 1 to 5.
Next write along the top of the page: the topic, your name and a date. Then in panel ① you can write a longer description of the project. What about calling it “Coding a simple rainbow in Processing”.
Step 2. Sketch the scene
In this step you will make a sketch of your scene. You will place your sketch in panel ②. But before you sketch, read through this step first.
Why do we make a sketch? It is always a good strategy to sketch a picture that represents the graphics picture that you are going to make. It does not need to be perfect, just good enough to lay down your ideas. Do it before you start coding!
These sketches provide you with a “goal”. A vision of what your idea could look like. It will help you realise how close you are to completing your program. It will also allow you to realise when you have completed enough work! In other words, when you get close to completing your project you will have something (a sketch) to check the remaining tasks.
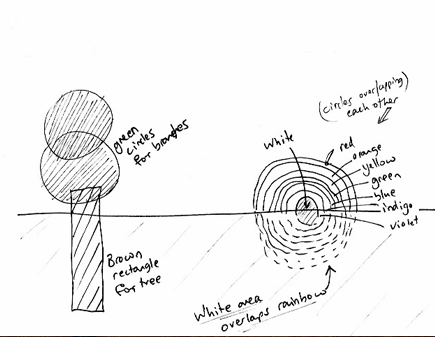
My sketched plan is simple. It is made from several circles, and lines on a white sheet of paper.
Let us note a few important features, that helped me communicate my ideas.
Make your sketch have the same aspect ratio to the final picture. (Consider the rule of thirds).
Photographers often suggest that scenes should be taken using a rule of thirds. Sometimes we place the main objects in the centre of the scene. But actually if we put it slightly off centre, then it may look better. In our case it will probably look better if the rainbow was slightly off centre. Also, it would look better when the horizon either fits on the top third, or the lower third. In other words, do not put the horizon in the middle of the page.
To achieve the rule of thirds division, imagine that you divide the space into a grid of nine equally proportioned regions. My rainbow is placed on the horizon line, which is on the lower horizontal line. And the tree is placed on the left hand side.
When taking photographs you may automatically position your scene in this way. But when doing computer graphics, you probably need to make a deliberate decision to put it this way.
Make sure your sketch clearly explains your ideas. Add labels and annotations.
Annotations and labels help to clarify aspects of the picture that may be unclear. You won’t always remember all the decisions you made, so the labels will help you remember what you decided to do.
In addition, you may want to make your own language to help you communicate your ideas. In my sketch, I have tried to use solid lines to show objects that can be seen. Dotted lines to suggest that these objects will be behind something. And shaded areas to clarify that there are different objects.
Now make your sketch, and place it in panel ②.
Step 3. Think about the parts
In this step you will think about the parts to your scene, and write these down in panel ③. But again, before you do so, read through this step.
You may have noticed already: that my sketch does more than draw a picture of the output; it is hinting how I will create it. It is a sketch to help me think about the implementation. There are clearly several parts to the drawing. In the previous post on “Introduction to Processing” we used some basic geometric shapes (lines, circles, rectangles, etc.), and defined them to be primitives in computer graphics. We also talked about the appearances of these objects, which are named attributes. Let me work through my thought process, on thinking about primitives and attributes to build our rainbow scene:
First, let us consider the individual geometric shapes that make up the scene. The scene basically uses individual circles and rectangles that are put together to build the scene. These primitive shapes are grouped together to make recognisable objects (rainbow, tree, etc). So we have one rainbow, that is made from several circles, and grass and sky that are made from rectangles, and the tree, which is made from rectangles and circles.
Thinking this way is important. By breaking the scene into individual parts and thinking about it in a critical way, we can start to understand how we may implement it. Indeed, maybe we define a tree model, with a rectangles and leaves. Because now we have defined a tree model, we can make a forest, by replicating the tree model.
Second, we can think about the appearances and attributes of the scene. Each of the geometric shapes have specific colours and appearance. We have the rainbow made from red, orange, yellow, and so on, and the brown tree trunk, with green leaves, and any other colours and appearances we will use in the scene.
Thinking this way is important. By breaking the scene into individual parts and thinking about it in a critical way, we can start to understand how we may implement it, and what the reusable parts would be. Indeed, with the tree model, we may define a brown colour for the trunk of the tree, perhaps rgb(150,75,0). Then another day, you may want a different type of tree. Something that is much darker brown. To achieve this new tree, we just change the trunk colour, for example we could set it to rgb(54,27,0).
So, what are the parts to our scene? We should be able to write the parts. We can place them in panel ③.
Primitives: rainbow, tree, grass,

Attributes: rainbow: red, orange, yellow, green, blue, indigo, violet; trunk colour, leaf colour.
Step 4. consider the algorithmic steps
We now need to turn our attention to the steps needed to draw the image. In other words, we need to think about the algorithmic steps, that we write in panel ④.
To understand the graphics drawing process, I have created a physical mockup of the scene. This will help us think through the steps needed to create the picture.
You do not need to do create the mockup, unless you want to!
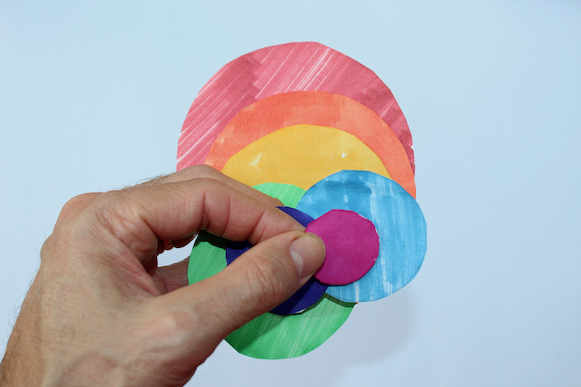
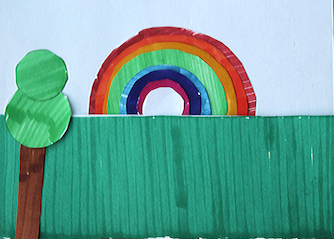
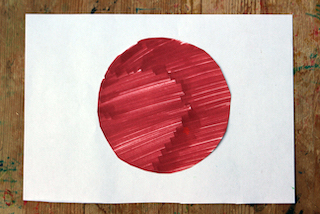
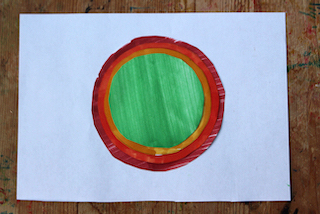
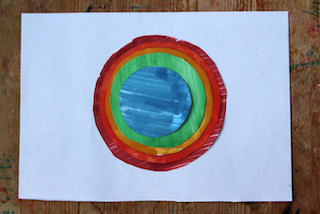
The mockup is made from circles cut from paper, and coloured by the colours of the rainbow. To start the scene, I placed the large red circle, and progressed through the individual rainbow colours, ending in white. This gives us 7 colours of the rainbow plus a white circle.
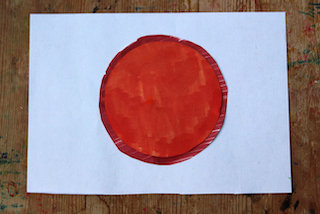
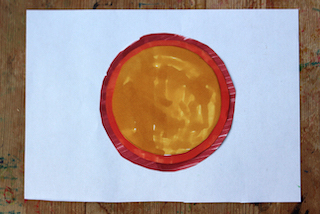
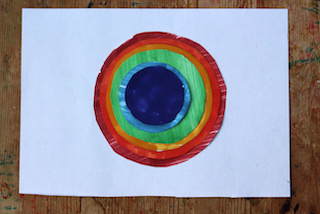
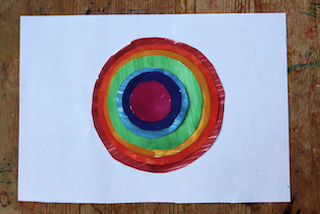
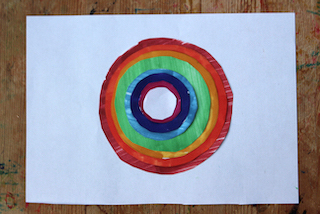
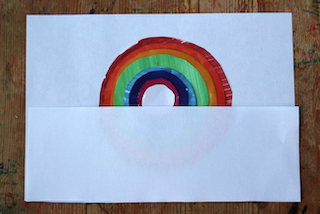
This demonstrates a common principle in computer graphics; one of order. The earlier painted objects look like they are placed at the back. Older models are naturally obscured by newer ones. In computer graphics terms, this is known as “depth order”. That is, if one object obscures another, we know that it is painted after that object. This property can help us create complex looking models, even if the models are made from simple shapes. We see this “visual illusion” taking place in the last picture – it actually looks likes the shapes are all donuts, rather than circles. And then by adding a white rectangle, the rainbow now looks like an arc. Actually the large white rectangle (in my picture) appears slightly transparent (you can just about see the underlying circles); likewise in computer graphics we can change the transparency (the alpha α value) of the primitive, to allow objects that are behind to become seen.
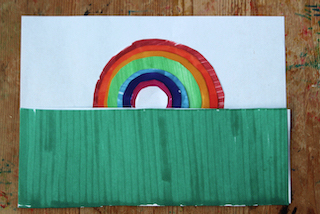
We can continue with the model, by adding grass, and then the trunk of the tree, before adding the leaves.
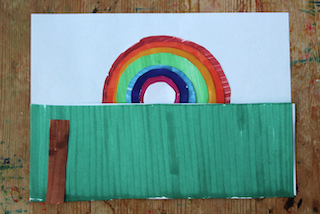
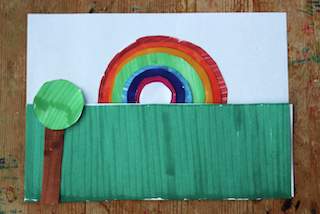
Final mockup of the rainbow scene
Now we can complete the 4th part of the Critical Thinking Sheet.
draw rainbow     // made from 7 individual circles
                 // and one centre white circle
draw grass       // made from one large rectangle
draw tree        // rectangle and two green circles
Notice, in this set of steps I have also added some comments. This is indicated by the two forward slashes “//”. Anything written to the right of this symbol is non-executable code, and for comment.
Step 5. What now?
The final stage is to consider what we need to do now, to make this idea a reality!
You probably have been asking yourself lots of questions. During your planning process you may have started to realise that you did not understand something. Perhaps you need to go back and do more research on RGB colours. Possibly, you missed the Introduction to Processing post, and you need to do that first. Or you realise that you could improve the model to make the rainbow appear smoother through using transparency. Or you want to make it animate in some way. There are lots of options and lots of things that you may need to consider when you are implementing your code.
These thoughts are all good. They help you decide how to take this idea, and implement it. You are reflecting on your ideas.
So, now in the final panel ⑤ make a list of all your concerns, caveats, or considerations that you need to make, such to make this concept a reality!
You have now completed the Critical Thinking Sheet. Finally, reflect on your thought process, and what you have achieved.
- ① you have have carefully thought through the problem, and written a quick summary of the task;
- ② drawn a quick sketch, with annotations and labels, to describe your main idea, and what it will look like (to give you a goal to head towards, and something to check against);
- ③ you have considered the main components and variables of the system;
- ④ considered the main algorithmic steps to create the code;
- and finally ⑤ considered any caveats and conditions that you need to learn, understand or observe, to achieve your goal.
Now, how about using the Critical Thinking Sheet on another project, to help you think through your ideas.
Looking further
We us this strategy in our Computer Graphics teaching, and have written several papers on this topic, that you may like to read. Including Critical Thinking Sheets, CTS for Design Thinking in Programming Courses.
Critical thinking is covered in chapter 3, of our book on Five Design-Sheets. The Five Design-Sheet method enables you to consider many different design solutions.